Word Camph SV Home & Kitchen Ideas Do It Yourself Kitchen Cabinets How to Fake a Custom Look with Trim

Do It Yourself Kitchen Cabinets How to Fake a Custom Look with Trim

If you’ve ever wanted custom kitchen cabinets but don’t have the budget for a full renovation, you’re not alone. High-end custom cabinets can be costly, but there’s an easy and affordable way to achieve the same luxurious look: trim.

Adding trim to your kitchen cabinets can transform them into something special and give the illusion of custom-built designs—without the hefty price tag. In this detailed guide, we’ll show you how to fake a custom look for your kitchen cabinets using trim.

Whether you’re refreshing old cabinets or just want to make a quick, budget-friendly update, this Do It Yourself Kitchen Cabinets project will give your kitchen a stylish new look.

Why Choose Trim for Your Kitchen Cabinets?

The Benefits of Trim

Trim is often underestimated, but it’s one of the most powerful tools in interior design. When it comes to kitchen cabinets, adding trim can completely change the appearance of the space. By using trim strategically, you can make your cabinets look custom-made, sophisticated, and designer-worthy.

  • Affordability: Custom cabinetry comes with a hefty price tag. However, trim is an affordable option that allows you to achieve a similar effect without the financial strain.

  • Customization: Trim comes in a variety of styles, so you can choose the one that best matches your kitchen’s theme. Whether you prefer a modern, farmhouse, or traditional look, there’s a trim style that will complement your design vision.

  • DIY-Friendly: You don’t need to hire a contractor to get this look. With just a few basic tools, you can do it yourself and save on labor costs.

  • Quick Transformation: Unlike full cabinet replacements or major renovations, adding trim is a fast project that you can complete in a weekend.

Types of Trim for Cabinets

When choosing trim, consider the style of your kitchen and the look you’re going for. Some popular types of trim include:

  • Crown Molding: This is the trim that sits on top of your cabinets. It’s one of the most popular choices for creating an elegant, custom look.

  • Baseboard Trim: Similar to crown molding, baseboard trim runs along the bottom of your cabinets, giving them a finished look.

  • Beadboard: Beadboard is a classic, charming trim that adds texture and interest to your cabinets, giving them a more cottage or vintage vibe.

  • Shaker-Style Trim: If you want a modern or minimalist look, shaker-style trim provides clean lines and simple design that complements contemporary kitchens.

Tools and Materials You’ll Need

Before starting your project, make sure you have all the necessary tools and materials. While the list isn’t long, each item is essential to completing the job correctly.

Materials:

  • Trim Pieces: Select trim that fits the style and aesthetic you want to achieve. You can find it at most home improvement stores in different materials such as wood, MDF, or PVC.

  • Wood Filler: This will be used to fill any gaps or nail holes once the trim is installed.

  • Paint or Stain: Depending on the finish of your cabinets, choose either paint or stain to match the trim to the existing cabinets.

  • Caulk: To fill any gaps between the trim and the cabinets, ensuring a smooth, polished finish.

  • Adhesive (Optional): For a no-nail approach, construction adhesive can be used to secure trim to the cabinet surface.

Tools:

  • Measuring Tape: You’ll need this to measure the lengths of your trim pieces accurately.

  • Miter Saw: This tool allows for precise angled cuts, especially important for corners.

  • Nail Gun or Hammer: To attach the trim to the cabinet surface. If you prefer not to use nails, adhesive can be an alternative.

  • Level: To ensure your trim is straight and level as you install it.

  • Paintbrush or Sprayer: For applying paint or stain evenly across your trim pieces.

  • Wood Filler Knife: This will be used to fill nail holes and any seams in the trim.

Step-by-Step Guide to Adding Trim to Your Kitchen Cabinets

Ready to get started? Here’s how to add trim to your kitchen cabinets in a few simple steps.

Step 1: Prep Your Cabinets

The first step in any DIY project is preparation. Clean your cabinets thoroughly before adding any trim. Use a damp cloth to remove any grease, grime, or dust from the surface. If you plan on painting your trim, you may also want to lightly sand the cabinet frames to create a smooth surface for the trim to adhere to.

If your cabinets have old trim or any hardware you plan to replace, remove them first. Use a utility knife or a pry bar to carefully remove the trim. Be gentle so as not to damage the surface underneath.

Step 2: Measure and Cut the Trim

Now that your cabinets are prepped, it’s time to measure and cut the trim. This part of the process requires precision, so take your time and measure carefully. Here’s how to do it:

  1. Measure the cabinet edges: Using a measuring tape, measure the length and height of the areas where you want to apply trim. For example, if you're installing crown molding, measure the top edge of each cabinet.

  2. Cut the trim: Using a miter saw, cut your trim pieces to the appropriate length. If you're cutting trim for corners, you'll need to use a 45-degree angle (called a miter cut). This will ensure the pieces meet seamlessly at the corners. Double-check your measurements and cuts before attaching the trim.

  3. Dry fit the pieces: Before attaching the trim, place it against the cabinet to make sure it fits perfectly. If any adjustments are needed, now is the time to make them.

Step 3: Apply the Trim

Once you’re satisfied with the fit, it’s time to attach the trim. You can use either a nail gun or adhesive, depending on your preference.

Method 1: Nail Gun

If you have a nail gun, this is the fastest and most efficient way to secure the trim. Line up the trim with the cabinet frame, ensuring it’s straight using your level. Then, use your nail gun to secure the trim, placing nails every few inches along the trim. Be careful not to nail too close to the edges to avoid splitting the wood.

Method 2: Adhesive

If you prefer not to use nails, you can use strong construction adhesive to secure the trim. Apply a thin layer of adhesive to the back of the trim and press it into place. Hold the trim for a few seconds to ensure it sticks, and use painter's tape to hold it in place as the adhesive dries.

Step 4: Fill in the Gaps and Nail Holes

Once the trim is secured, you may notice small gaps, nail holes, or seams between pieces. To create a smooth and flawless finish, fill these spaces with wood filler. Apply the filler with a putty knife, ensuring it is smoothed out to be level with the trim.

Once the wood filler dries, lightly sand the filled areas to make them smooth. Wipe down the trim to remove any dust or debris from sanding.

Step 5: Caulk the Edges

To give your cabinets a polished, professional look, use caulk to seal any gaps between the trim and the cabinet frame. Run a bead of caulk along the edges of the trim and smooth it out with your finger or a caulk-smoothing tool. This will eliminate any visible gaps and ensure a clean finish.

Step 6: Paint or Stain the Trim

Now that everything is in place, it’s time to add color. If your cabinets are already painted, you can paint the trim to match. If you prefer a natural wood look, stain the trim instead. Be sure to use a paint or stain designed for cabinets so that the trim can withstand the wear and tear of the kitchen.

  • Painting: Apply at least two coats of paint to your trim, letting each coat dry fully before applying the next. Choose a high-quality, durable cabinet paint for the best results.

  • Staining: For a natural wood look, choose a stain that complements the color of your cabinets. Apply the stain with a clean brush or cloth, and allow it to sit for a few minutes before wiping away any excess.

Step 7: Let Everything Dry

After painting or staining, let your trim dry completely before touching or installing any items back in your cabinets. This may take several hours or even overnight, depending on the paint or stain you’re using. Be patient and allow the trim to fully cure.

Adding Extra Details for an Even More Custom Look

If you’re feeling creative and want to add extra flair to your cabinets, consider these additional trim options:

  • Baseboard Trim: Install baseboard trim along the bottom of your cabinets to create a traditional, elegant look. It’s especially useful for covering up gaps or imperfections along the floor.

  • Crown Molding: Adding crown molding to the top of your cabinets will instantly elevate their appearance. Crown molding is a timeless design feature that makes your cabinets look more expensive.

  • Beadboard Panels: For a farmhouse or cottage-style kitchen, add beadboard panels to the sides or backs of your cabinets. It’s an easy way to create texture and interest in the space.

Conclusion: Enjoy Your Custom-Looking Kitchen Cabinets

With a little time and effort, you can transform your kitchen cabinets into something that looks custom-designed—without the custom price tag.

Whether you choose crown molding, baseboard trim, or beadboard, these simple upgrades will make a huge difference in your kitchen’s appearance.

Best of all, this is a DIY Cabinet project that anyone can do with a few basic tools and materials. So go ahead—give your kitchen the custom touch it deserves and enjoy your beautiful, budget-friendly cabinets for years to come!

Related Post

Wood Furniture – The Common Item Between Royalty and the Common PersonWood Furniture – The Common Item Between Royalty and the Common Person

Nothing comes even close to the beauty of wood furniture. In spite of the emergence of various kinds of resources for furniture on the market today, wood may remain the favourite for all. The style, the warmth mood shown by wooden furniture is matchless. Wooden furniture will work for both inside and outdoors. Great for providing a natural impact, the scent of wood itself delivers a relaxing and heat atmosphere. It is observed in lots of professional centers like resorts and spas applying mainly wood material. The same comforting environment is seen in contemporary domiciles with wooden furniture.Thi công nội thất gỗ tự nhiên

There are a wide variety of furniture created from numerous kinds of wood which carry a different impression. Teak, oak, mahogany, cherry, maple have their own look that are used for common or traditional furniture , modern or traditional furniture. Their special traits, including simple to be constructed, hence assist in creating furniture in diverse designs and patterns. Furniture made of wood has large ranges of designs and shapes. While the original furniture or old-fashioned furniture in wood has more shapes and ornate habits with delicate details, the modern, mainstream furniture are in lines and sleek patterns. The brand new idea of smart in contemporary wooden furniture is now highly popular in new years. Wood furniture producers are supplying a whole selection of modern furniture types in wood on practical schedule with as easy characteristics as possible.

Furniture created of numerous types of solid wood is given different finishes. You can even have the replicate teak, cherry or antique look with regards to the finish applied. Modern wood furniture is decorated or waxed or varnished or polished with oils and other materials. While varnishing provides a shiny look, the wooden furniture can be held natural. A very important thing is that you can provide almost any completes that fit effectively together with your space wall shade, home furnishings and other items. If you’re looking for a hot, rich shade scheme nothing defeats the appearance of wood. The rich tones provide any piece a simple atmosphere that lends itself to a serene atmosphere. A great pre-treatment is vital ahead of the manufacturing method, to cut back the moisture content in the wood and also ensure it is insect repellant, which ensures the durability and quality of wood.

The apparent wood materials, the organic and other finishes, the various styles, the brown shade, the grains all work together to create different furniture items. The timeless elegance of wood provides an all natural beauty in to your space with vibrant and sturdy completes that highlight the wood grain. Carry the organic beauty of wood furniture in to your home for a search that’s comforting and beautiful.

It would seem that much of today’s furniture is made from constrained panels and plastic wood-like veneers. That is due in large part to an economic program that’s left house holds unable to manage to offer top money for furniture. If you don’t believe you can afford quality furniture , think again. It’s completely possible to get quality made wood furniture at a good price. Understanding how to identify what causes a bit of wood furniture to be quality versus ineffective could be the first faltering step to upgrading your home furnishings.

When selecting furniture for your room, living area or any room in your, you is going to be taking a look at the different choices of wood furniture that are plentiful in the present stores. Furniture of a good wood structure is an ideal improvement to any home. Whatever the over all design of your home whether contemporary, country sheik or vintage, when the right types and shades are coupled with quality furniture your home will sparkle with class and style too.

Wood furniture can function in just about any space of one’s house. Due to the numerous forms of wood furniture available on the market today, understanding how to recognize quality in wood furniture can appear complicated, but when you take some time to get ready your self on the subject, it can will be uncomplicated. Knowing what to look for when analyzing wood furniture makes finding the most effective offers on your own wooden merchandise a snap. The internet is a wonderful instrument for doing such research.

As it pertains to wood room furniture , whether conventional or modern, you will require the wood to be resilient and the pieces well made. Furniture that consists of a hardwood could be the sensible path to begin your search. Hardwood furniture are produced from birch, cherry, maple, mahogany, walnut, teak and walnut. These woods are regarded as sturdy and come in many variations that may match perfectly in to any home’s interior and most family budgets.

Soft woods like forest wood , fir, true pine and redwood do not provide the durability of the hardwoods noted above. Nevertheless, with modern technology, the wood furniture made out of these kind of soft woods are also referred to as engineered woods. The manner of combining smooth wood and making the smoother woods harder and more widely accessible permits the softer woods to be provided with no worry of breaking and in addition it generates wooden furniture that holds a dandy cost too. Manufactured soft woods are now harder and stronger than ever before.

In regards to efficiency, attractive seems and the robustness of furniture structure should really be certainly one of your considerations. Nevertheless, though it may not be all that fun, examining the joints and energy of a furniture’s construction is much more crucial than appearance. Well made wood furniture is never fixed or affixed everywhere that’s can be seen by the human eye. Go through the place blocks for stability. That is vital in solid furniture and most important in furniture which is applied daily such as for example bedrooms, couches and tables and chairs.

Generally take a consider the rear boards on your own wood furniture too. Even if you policy for an item to situated against a wall, the backer pieces must always get in touch by screws for included toughness and strength. All hidden areas, including rooms must certanly be sanded at ab muscles least. Posts of furniture which have drawers, such as for instance tables and dressers, needs to have dust panels involving the drawers. Not only does this increase the toughness of the furniture nội thất gỗ tự nhiên bit but it will confine dust as well.

One last crucial feature to consider is the conclusion of the wood. Quality produced wood furniture can be sanded before any spots are put on give a smooth completed search and touch. Additionally, the feed of the wood could be more desirable when tainted if it’s been precisely sanded.

Wood furniture must be an attractive addition to any space in your house, no eyesore waiting to happen. By performing some study and inspection of one’s potential furniture pieces, you’ll manage to discover the perfect furniture parts to complement your properties interior decor and your house budget.

Water Leak Detection Detecting and Preventing Costly Water DamageWater Leak Detection Detecting and Preventing Costly Water Damage

Water leaks may seem like a minor issue, but if left undetected and unaddressed, they can cause significant damage to a property. In fact, according to the Environmental Protection Agency (EPA), water leaks account for an average of 10,000 gallons of water wasted in American homes every year. In addition to the financial impact, leaks can also lead to mold growth, structural damage, and potential health hazards. That’s why it’s crucial to have a reliable water leak detection system in place. In this article, we’ll discuss the importance of water leak detection and how it can save you from costly repairs.

There are various ways that a water leak can occur in a home or a commercial property. Some leaks may be easy to spot, such as a dripping faucet or a visible pipe leak. However, others may not be as obvious, such as a hidden pipe leak behind a wall or under a concrete slab. This is where a 横浜 水漏れ system comes into play.

One of the most common methods of water leak detection is through the use of water meters. A water meter keeps track of the amount of water used in a property, and if there is a sudden increase in water consumption, it could be an indicator of a leak. However, if the leak is small, it may not register on the water meter, making this method less effective.

Another popular method of water leak detection is through the use of electronic leak detection instruments. These devices use sound waves or thermal imaging to detect the location of a leak. This method is highly accurate and can pinpoint the exact location of a leak, even if it is hidden under the surface. However, it may require professional equipment and expertise to use effectively.

Some modern water leak detection systems also use sensors and alarms to alert homeowners or property owners of potential leaks. These sensors are placed in areas where leaks are likely to occur, such as under sinks, near hot water heaters, and around appliances. When moisture is detected, an alarm will sound, allowing homeowners to take immediate action before the leak worsens and becomes more costly to repair.

Aside from detecting leaks, water leak detection systems also come with many preventative measures. For example, some systems can automatically shut off the main water supply when a leak is detected, preventing any further damage. Other systems may have remote monitoring capabilities, allowing property owners to check for leaks even when they’re not physically there.

In addition to technology-based water leak detection systems, there are also proactive measures that homeowners and property owners can take to prevent leaks. Regularly inspecting and maintaining plumbing systems can significantly reduce the chances of a leak occurring. Look for any visible signs of leaks, such as discoloration or water stains on walls or ceilings. It’s also essential to repair any plumbing issues promptly, rather than waiting for them to worsen.

In conclusion, water leak detection is a crucial aspect of property management that should not be overlooked. From avoiding costly repairs and damage to preventing health hazards, having a reliable water leak detection system in place can save you time, money, and potential stress. Whether it’s through technology-based systems or through proactive measures, taking steps to prevent and detect water leaks can go a long way in protecting your property and your wallet.

Mini Dosa Guide: Party Snack Ideas and TipsMini Dosa Guide: Party Snack Ideas and Tips

If you are looking for a fun and delicious snack to impress your friends at a party, mini dosas are the perfect choice. Known for their crispy texture and soft centers, mini dosas are versatile, easy to make, and loved by people of all ages.

In fact, if you ever visit the best restaurant in Karachi, you will see how these bite-sized delights are often served as appetizers or party snacks.

This guide will cover everything from ingredients, preparation tips, filling ideas, to serving suggestions to make your party a hit.

What is a Mini Dosa?

A mini dosa is a smaller version of the traditional South Indian dosa. Unlike the regular large dosas, mini dosas are made in small, round portions that are perfect for snacking. They are usually crispy on the edges and soft in the middle, making them a versatile base for many fillings. Mini dosas are ideal for parties because guests can enjoy them without needing plates or cutlery.

Ingredients Needed

The key to perfect mini dosas is having the right ingredients. You will need:

  • Rice – Traditionally, parboiled rice works best for dosa batter.

  • Urad Dal (Black Gram Lentils) – Helps make the batter light and airy.

  • Fenugreek Seeds – Adds flavor and aids fermentation.

  • Salt – To taste.

  • Oil or Ghee – For cooking the dosas.

Optional ingredients for fillings:

  • Mashed Potatoes – For a classic masala dosa filling.

  • Paneer – Cubed or mashed with spices.

  • Vegetables – Carrots, peas, corn, bell peppers.

  • Cheese – For a fusion twist.

  • Chutneys – Coconut, tomato, or mint chutney.

Preparing the Batter

Making dosa batter is straightforward but requires attention to detail.

  1. Soak the Ingredients – Soak rice and urad dal separately for at least 4-6 hours. Fenugreek seeds should be soaked with the urad dal.

  2. Grind to Smooth Paste – Use a blender or wet grinder to make a smooth paste of rice and dal. Add water gradually to avoid a runny batter.

  3. Ferment the Batter – Allow the batter to ferment overnight or for 8-10 hours. The batter should rise and develop tiny bubbles. Fermentation gives dosas their signature tangy flavor.

Pro Tip: If you live in a cooler climate, place the batter in a slightly warm oven or near a stove to help it ferment faster.

Tips for Making Perfect Mini Dosas

Making mini dosas requires a slightly different technique from regular dosas. Here are some tips:

  • Use a Non-Stick Pan – This helps prevent sticking and ensures even cooking.

  • Preheat the Pan Properly – A hot pan ensures crispiness.

  • Grease Lightly – Use a few drops of oil or ghee to coat the pan.

  • Control Batter Amount – Use 2-3 tablespoons per mini dosa to maintain a small, manageable size.

  • Cook on Medium Heat – High heat may burn the dosa before it cooks fully inside.

Filling Ideas for Mini Dosas

Mini dosas are blank canvases for endless fillings. Here are some ideas that work well for parties:

Classic Masala Filling

Masala dosas are a staple in South Indian cuisine. For mini dosas:

  • Boil and mash potatoes.

  • Sauté with onions, green chilies, turmeric, and mustard seeds.

  • Add salt and coriander leaves.

  • Place a spoonful of filling on each dosa and fold or roll.

Paneer Delight

Paneer lovers will enjoy this filling:

  • Crumble paneer and mix with sautéed onions, bell peppers, and spices.

  • Add a pinch of chili powder and garam masala.

  • Spoon onto mini dosas for a rich and creamy snack.

Cheesy Veggie Mix

This fusion filling is perfect for kids and teens:

  • Sauté diced vegetables lightly with olive oil.

  • Add grated cheese and mix well.

  • Place on mini dosas while hot so the cheese melts slightly.

Sweet Mini Dosas

Don’t forget dessert! Sweet mini dosas can be made by:

  • Spreading a thin layer of chocolate or Nutella.

  • Adding finely chopped fruits like bananas or strawberries.

  • Sprinkling with nuts or coconut flakes.

How to Serve Mini Dosas at Parties

Presentation is key when serving mini dosas. Here are some ideas:

  • Tiered Platter – Arrange mini dosas on a tiered serving tray for a visually appealing display.

  • Dipping Station – Offer a variety of chutneys and sauces on the side.

  • Skewered Mini Dosas – Thread folded mini dosas on skewers for easy grab-and-go snacks.

  • Mini Plates – Serve 2-3 mini dosas per small plate for neat portions.

Making Mini Dosas in Bulk

For parties, you may need to make dozens of mini dosas. Here are tips for bulk preparation:

  • Prepare Batter in Advance – Make and ferment the batter a day before the party.

  • Use Multiple Pans – Cook dosas simultaneously to save time.

  • Keep Warm – Store cooked dosas in a low oven or insulated container.

  • Pre-Make Fillings – Prepare fillings ahead of time to assemble quickly.

Pairing Mini Dosas with Drinks

Mini dosas go well with a variety of drinks. Here are some ideas:

  • Chai or Masala Tea – A warm and comforting combination.

  • Lassi – Sweet or salty yogurt drink complements spicy dosas.

  • Fresh Juices – Mango, orange, or pomegranate juice pairs well.

  • Mocktails – Light and fruity mocktails balance the savory flavors.

Why Mini Dosas Make the Perfect Party Snack

Mini dosas are ideal for parties for several reasons:

  • Portion Control – Guests can take one or two without overindulging.

  • Customizable – Fillings can be adjusted to suit vegetarian, vegan, or kid-friendly preferences.

  • Easy to Eat – Bite-sized portions mean no plates or forks are necessary.

  • Delicious – Crispy, soft, and flavorful, mini dosas satisfy all taste buds.

Common Mistakes to Avoid

Even experienced cooks can make mistakes. Avoid these to ensure perfect mini dosas:

  • Batter Too Thick – This results in heavy, chewy dosas.

  • Pan Not Hot Enough – Leads to sticking and uneven cooking.

  • Overcrowding the Pan – Cook one at a time if necessary.

  • Skipping Fermentation – Skipping this step affects taste and texture.

Exploring Mini Dosas at the Best Restaurant in Karachi

If you want inspiration for your own mini dosas, visiting the best restaurant in Karachi can be a fun experience. Many restaurants serve mini dosas with innovative fillings, sauces, and presentation styles. Observing their techniques can give you ideas for your party, from batter consistency to creative garnishing.

Creative Party Presentation Ideas

To make your mini dosas the star of the party:

  • Mini Dosa Tower – Stack mini dosas like pancakes and serve with skewered toppings.

  • Colorful Fillings – Use vibrant vegetables like carrots, beetroot, and bell peppers.

  • Sauce Drizzle – Drizzle chutney or yogurt over dosas for a gourmet look.

  • Interactive Station – Let guests assemble their own mini dosas with different fillings and dips.

Storage Tips

Mini dosas are best served fresh, but you can store them if needed:

  • Uncooked Batter – Refrigerate for up to 2-3 days. Stir well before use.

  • Cooked Mini Dosas – Keep in an airtight container and reheat on a skillet.

  • Pre-Made Fillings – Store separately in the fridge and assemble just before serving.

Health Benefits of Mini Dosas

Mini dosas are not just tasty—they can also be healthy:

  • Fermented Batter – Aids digestion and boosts gut health.

  • Low in Fat – Can be cooked with minimal oil.

  • Customizable Nutrition – Add vegetables, legumes, and lean proteins to fillings.

  • Gluten-Free Option – Naturally gluten-free if using rice and lentils.

Tips for Kid-Friendly Mini Dosas

Mini dosas are perfect for kids’ parties. Keep these tips in mind:

  • Mild Flavors – Avoid spicy fillings for younger children.

  • Fun Shapes – Use small cookie cutters for novelty shapes.

  • Cheese Lovers – Add a layer of melted cheese to attract picky eaters.

  • Interactive Cooking – Let kids assemble their own mini dosas with simple fillings.

Vegan and Gluten-Free Options

You can make mini dosas suitable for everyone:

  • Vegan – Skip dairy and use plant-based oils.

  • Gluten-Free – Rice and urad dal batter is naturally gluten-free.

  • Plant-Based Fillings – Use mashed vegetables, beans, or tofu.

Hosting a Mini Dosa Party

To host a mini dosa-themed party successfully:

  1. Plan Your Menu – Include a variety of fillings, dips, and drinks.

  2. Prep in Advance – Make batter and fillings beforehand.

  3. Interactive Stations – Let guests customize their mini dosas.

  4. Garnish Creatively – Use fresh herbs, seeds, or sauces for a professional touch.

  5. Keep Portions Bite-Sized – Makes it easy for guests to sample multiple flavors.

Conclusion

Mini dosas are more than just a snack—they are an experience. Whether you are hosting a casual gathering or a festive party, they offer versatility, flavor, and a touch of sophistication. From classic masala fillings to cheesy or sweet variations, mini dosas can be adapted to suit every palate. With a little preparation and creativity, your party will be remembered for its unique and delicious mini dosa offerings.

Visiting the best restaurant in Karachi can inspire you to elevate your mini dosas, learn new presentation techniques, and experiment with exciting fillings. Remember to ferment the batter properly, cook dosas on medium heat, and serve with an array of chutneys to delight your guests. Whether you are cooking for friends, family, or a special event, mini dosas are a snack that combines tradition, flavor, and fun.

Cleaning Services Making Life Easier, Cleaner, and HealthierCleaning Services Making Life Easier, Cleaner, and Healthier

Cleaning is a never-ending task that most people dread. Whether it’s keeping your home tidy or maintaining a clean and hygienic workplace, it can be time-consuming, labor-intensive, and overwhelming. That’s where cleaning services come in, offering a helping hand to make your life easier, cleaner, and healthier. In this article, we’ll explore the benefits of hiring a professional cleaning service and how it can improve your quality of life.

Cleaning services provide a range of services that cater to both residential and commercial properties. From regular housekeeping and maid services to deep cleaning and specialized services like carpet cleaning and window washing, they have the expertise and equipment to handle all your cleaning needs. This means you can sit back, relax, and leave the dirty work to the professionals while enjoying a clean and organized space.

One of the main advantages of hiring a cleaning service is the time it saves you. In today’s fast-paced world, time is a precious commodity, and spending it on cleaning can take away from other important tasks and responsibilities. With a professional cleaning service, you can free up your time to focus on your career, family, hobbies, or simply some well-deserved rest and relaxation without worrying about the mess.

Moreover, cleaning services offer a level of convenience that cannot be matched. They work around your schedule, meaning you can schedule cleanings for a time that is convenient for you. Many cleaning companies even offer same-day or emergency services, so you can get your home or office cleaned up in no time. With a cleaning service, you don’t have to worry about purchasing or storing cleaning supplies, as they bring their own equipment and products, saving you the hassle and expense.

Aside from the time and convenience benefits, hiring a professional cleaning service also ensures a thorough and efficient job. Trained and experienced cleaners have the knowledge and expertise to tackle any cleaning task, using specialized techniques and products to get the job done effectively. They also have access to commercial-grade equipment that can deep clean and sanitize your space, removing dirt, dust, and allergens that are often missed during regular cleaning.

Another significant advantage of cleaning services is the health benefits they provide. A clean and well-maintained environment is essential for good health, but it’s not always easy to achieve on our own. Professional cleaners use industry-standard sanitation practices and disinfectants, which can improve the overall hygiene of your space and reduce the risk of illnesses and infections. This is especially important in workplaces where the spread of germs can have a significant impact on employee health and productivity.

Not only do cleaning services improve the physical health of your space, but they also contribute to your mental well-being. Living or working in a clean and organized environment can alleviate stress, improve mood, and boost overall happiness. Coming home to a tidy house or arriving at a spotless office can make you feel more relaxed and motivated, allowing you to focus on other aspects of your life without distractions or added stress.

In conclusion, 川口市 遺品整理 play a vital role in maintaining a clean, healthy, and organized living and working space. Whether you need regular maintenance or a one-time deep clean, hiring a professional cleaning service can save you time, provide convenience, ensure thoroughness, and improve your overall well-being. So why not give yourself a break and leave the cleaning to the experts?

Seamless Gutters Providing A Number Of Benefits To The UsersSeamless Gutters Providing A Number Of Benefits To The Users

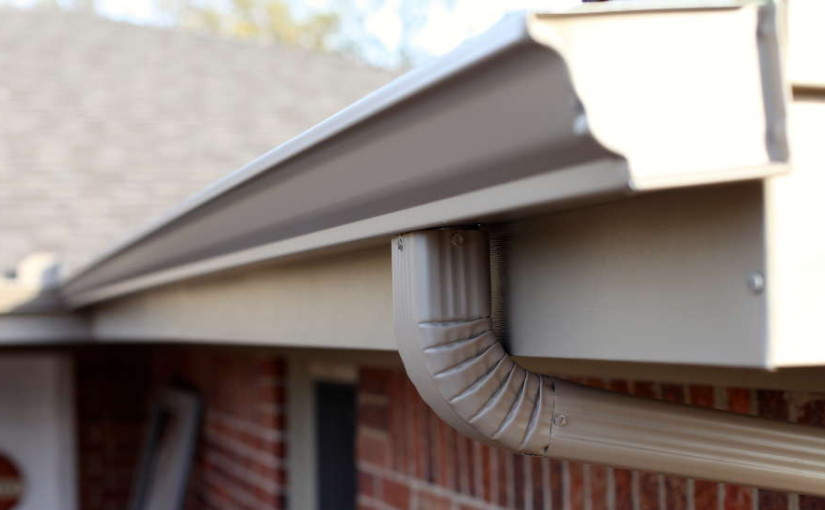
Saves Money: Easy gutters assist in preserving a lot of income and time in sustaining and fixing the top, walls and other parts of your house that could have been needed if your property was subjected to water problems triggered as a result of water leakages from deteriorating gutters. Inexpensive: These gutters may be fitted at fair and inexpensive rates owing to the truth that the products used for making these gutters such as material, copper, aluminum, vinyl etc. are common in the market. The easy accessibility of the products makes smooth gutters affordable.
Image result for Seamless Gutter
Sleek: Smooth gutters can be made according to certain requirements of individual homes and the preferences of specific customers. Hence that modification prevents almost any inaccuracies in the measurements of the gutters making the installation positively flawless. Maintains Hygiene: Since these gutters do not have any demarcations, they cannot permit the access of soil, dirt, chickens, bugs and chipmunks. This helps in sustaining the hygiene of the gutters for a long time, thereby helping you save the hassles and initiatives of washing them frequently.

Besides having innumerable benefits, smooth gutters involve certain concerns as well, that you simply must be aware of before you choose to install them. Easy gutters involve various details and are not easy to install. They can’t be fitted by laypersons without appropriate knowledge, talent and training. It’s required for you yourself to employ experienced and professional professionals to install them.

Since you cannot install them on your own, and need certainly to hire professionals for carrying out the job, it is often an expensive process to install smooth gutters. Nevertheless, inspite of the large installation charges of smooth gutters set alongside the sectional kinds, it should be remembered they are very tough and can help you save the expenses of washing the gutters frequently, which is generally involved in case there is sectional gutters.

But as the gutters are situated on the top of your dwelling, they’re constantly subjected to the other things that make them very susceptible to corrosion. Thus, despite the fact that seamless gutter installation raleigh nc are extremely tough and long-lasting, they do need periodic maintenance. Only a little maintenance can provide a endurance to these gutters, and hold your property clear and protected.

There are many features of installing seamless gutters that are fully lacking joints whilst the name suggests. Owing to the lack of stitches, they can effectively reduce water leakages from the gutters and helps in protecting your property against water damages. Easy gutters are tested in the period of installment on the webpage to prevent the odds of rating flaws. This process also assures that the gutters are designed and installed definitely in accordance with the look and requirements of your house.

However, it is very important for you yourself to know that the installment prices for seamless gutters could be far significantly more than the original ones. This is because it is not possible to put in the seamless system without professional support, owing to which it could be a costly process. However, since easy gutters are very much maintenance-free and can assist you to save future preservation prices, it’s value displaying the original installment costs. Nevertheless, the qualified support you hire for the installing smooth gutters must certanly be experienced and qualified enough to provide you probably the most efficient services.